Administrator Guide
This guide covers the full administrator toolkit — from approving bookings to configuring your entire facility.
Navigation
As an administrator, your sidebar includes everything employees see, plus:
- Financial — Unpaid bookings and invoice tracking
- Accounts — User account management
- Bookings — Full booking review workflow
- Daycare — Manage daycare dates
- Occupancy — Capacity planning calendar
- Announcements — Public notices
- Periods — Blocked date management
- Configuration — Facility setup and pricing
Pending badges: Red badges on the sidebar show how many bookings and daycare dates are waiting for your review.
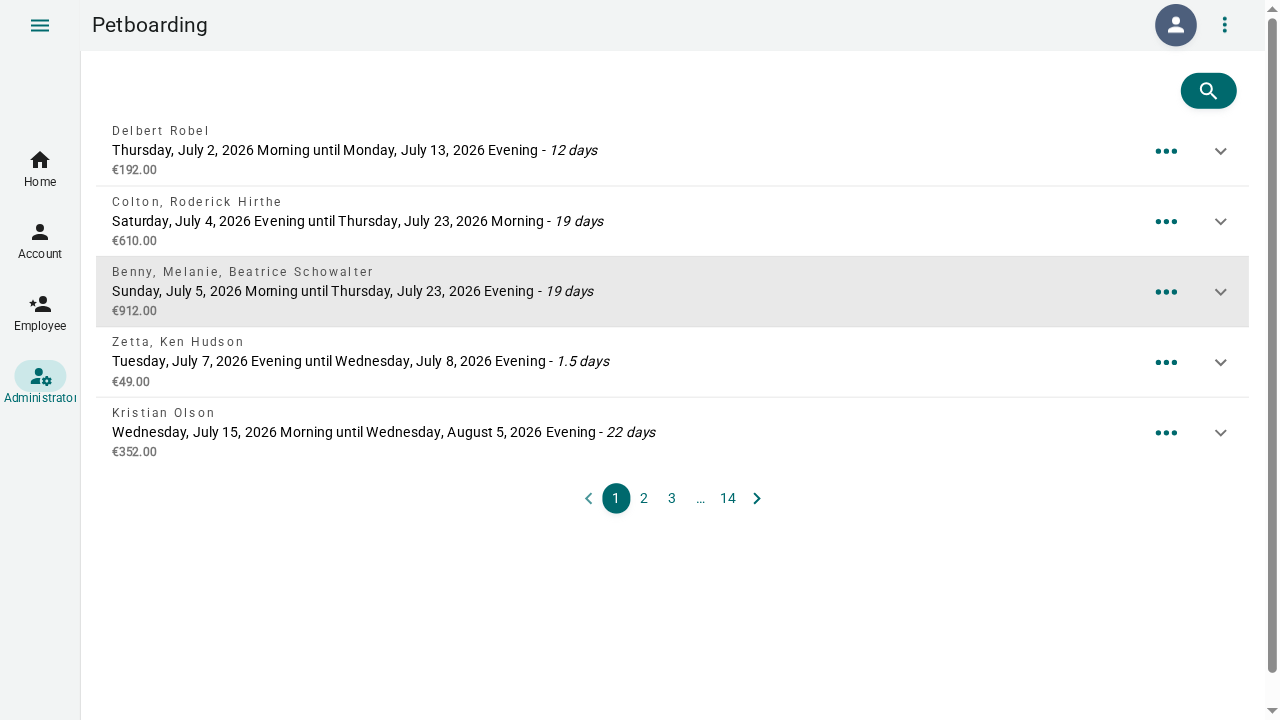
Reviewing Bookings
Viewing Pending Bookings
- Go to Admin → Bookings
- The page shows all bookings, filterable by status
- Click Pending to see bookings awaiting review
- Click a booking to view its details
Approving a Booking
- Open a pending booking
- Review the dates, pets, services, and customer information
- Check pet vaccination status — missing vaccinations may need attention
- Click Approve
- Pre-compose the approval email — review the Handlebars template
- Send — the customer receives an email with booking confirmation
Down payment: If configured, bookings can be approved as "awaiting down payment." The customer must pay before the booking is fully confirmed. Unpaid bookings are automatically canceled after the payment deadline.
Rejecting a Booking
- Open a booking
- Click Reject
- Compose a rejection email explaining the reason
- Send — the customer is notified
Placing on Standby
- Open a booking
- Click Standby
- The customer receives a notification that they're on the waiting list
- You can approve or reject standby bookings later
Replying to a Booking
Send a custom message without changing the booking status:
- Open any booking
- Click Reply
- Write your message
- Send
Settling Cancelations
Finalize canceled bookings:
- Go to Admin → Bookings
- Find a canceled booking
- Click Settle cancelation
- Cancelation costs are automatically calculated based on your configuration
Managing Daycare Dates
Reviewing Daycare
- Go to Admin → Daycare
- View the calendar showing all daycare dates
- Filter by status (pending, approved, etc.)
- Select multiple dates for bulk actions
Bulk Operations
- Approve selected — Approve all checked daycare dates
- Reject selected — Reject all checked daycare dates
- Standby selected — Place all checked dates on standby
Note: Daycare operations do not send automatic emails. Customers check their status on the daycare page.
Financial Management
Overview
- Go to Admin → Financial → Overview
- See all unpaid bookings with:
- Customer name
- Booking dates
- Amount due
- Days outstanding
- Filter by payment status
Booking Invoices
- Go to Admin → Financial → Bookings
- View invoice status for all approved bookings
- Track payments, outstanding amounts, and refunds
- Totals row summarizes all financial data
SlimFact integration: If configured, invoices are automatically created and payment statuses are synchronized. iDEAL payments are supported.
User Accounts
Managing Accounts
- Go to Admin → Accounts
- Search accounts by email, name, or filter by role
- Click an account to view details
Assigning Roles
- Open an account
- Add roles:
- Administrator — Full system access
- Employee — Staff operations
- Manager — Reserved for future use
- Intern — Reserved for future use
- Remove roles by clicking the remove icon
- Changes take effect on the user's next login
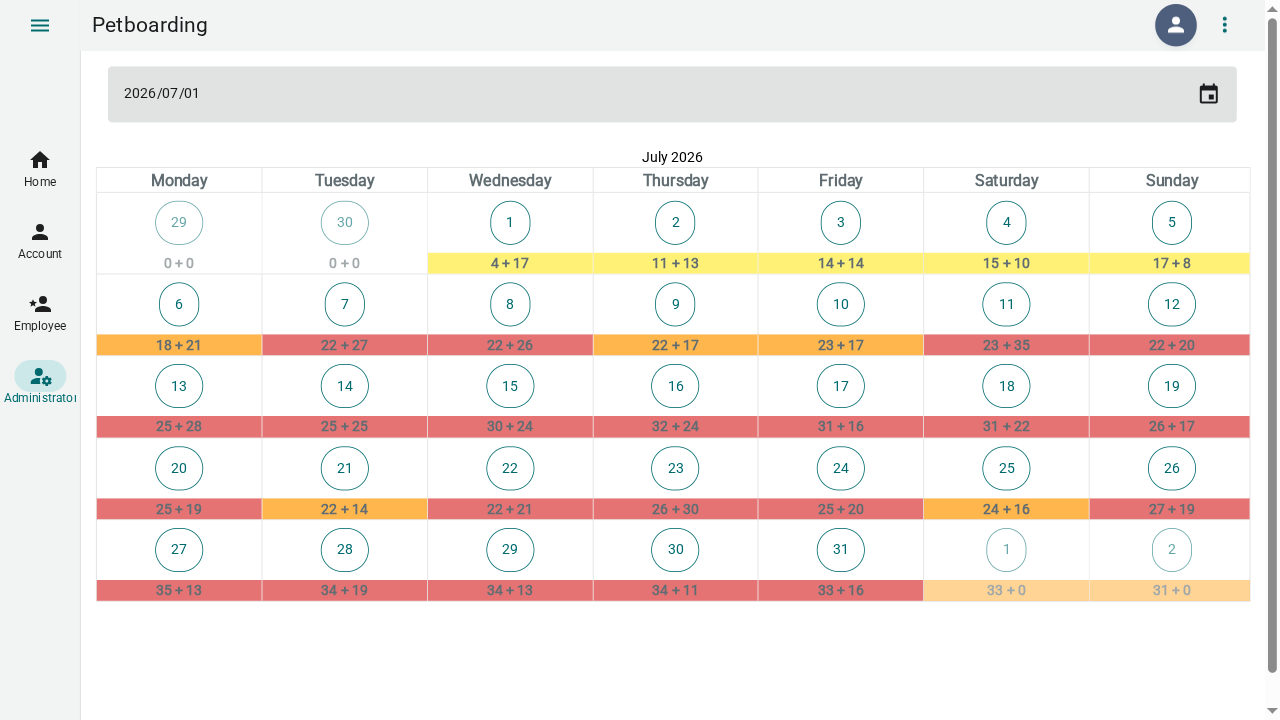
Occupancy Calendar
Plan capacity with the monthly occupancy view.
- Go to Admin → Occupancy
- Select a month using the date picker
- Each day shows two numbers:
- B — Booking pet count
- D — Daycare pet count
- Color coding:
- 🟢 Green — Well within capacity
- 🟡 Yellow — Getting busy
- 🟠 Orange — Nearly full
- 🔴 Red — At or over capacity
- Click a day to jump to the employee agenda for that date
Announcements
Post notices that appear on the public homepage.
Creating an Announcement
- Go to Admin → Announcements
- Click Add
- Fill in:
- Title — Short heading
- Message — Full announcement text
- Type:
- General — Standard notice
- Important — Highlighted notice
- Priority — High-visibility notice
- Urgent — Persistent popup dialog on the homepage
- Expiration date — When the announcement should automatically hide
- Click Submit
Managing Announcements
- Edit — Update title, message, type, or expiration
- Delete — Remove an announcement immediately
Periods (Blocked Dates)
Block dates when your facility is unavailable.
Creating a Period
- Go to Admin → Periods
- Click Add
- Set the start and end dates
- Choose a type:
- Unavailable for all — No bookings or daycare
- Unavailable for bookings — No boarding, daycare still allowed
- Unavailable for daycare — No daycare, boarding still allowed
- Add comments (visible to employees)
- Set minimum rating for exception — Allow high-rated customers to book despite the block
- Click Submit
Managing Periods
- Edit — Adjust dates, type, or comments
- Delete — Remove a period
Configuration
The configuration section controls every aspect of your facility. Access it from Admin → Configuration.
Buildings
Define your physical facility layout.
- Go to Configuration → Buildings
- Click Add
- Enter building name, location, and description
- Set display order to control the listing sequence
- Click Submit
Kennels
Add kennels within each building.
- Go to Configuration → Kennels
- Click Add
- Select the building this kennel belongs to
- Enter kennel name, description, and capacity
- Set display order
- Click Submit
Categories & Pricing
Set pet pricing categories by species and size.
- Go to Configuration → Categories
- Click Add
- Select species (dog or cat)
- Enter category name (e.g., "Small", "Medium", "Large")
- Set the base price per day
- Set display order
- Click Submit
Category Prices (Date-Based Overrides)
Set prices that change on specific dates (e.g., annual price adjustments):
- In the Categories page, select a category
- Add a category price with an effective date and list price
- Prices automatically apply from the effective date forward
Opening Times
Define when customers can drop off and pick up pets.
- Go to Configuration → Opening Times
- Click Add
- Enter a name (e.g., "Morning drop-off")
- Set start time and end time
- Select days of the week when this slot is available
- Choose a type:
- Arrival — Drop-off time slot
- Departure — Pick-up time slot
- All — Both arrival and departure
- Set start day counted and end day counted — Controls how days are priced:
- 1.0 = full day
- 0.5 = half day
- Mark unavailable holidays — Dates when this slot is not available
- Optionally disable the slot temporarily
- Click Submit
Services
Offer optional add-on services.
- Go to Configuration → Services
- Click Add
- Enter service name and description
- Choose type:
- Appointment — Scheduled service (e.g., grooming)
- Surcharge — Per-stay fee (e.g., medication administration)
- Set the list price
- Optionally hide or disable the service
- Click Submit
Daycare Subscriptions
Create prepaid daycare packages.
- Go to Configuration → Daycare Subscriptions
- Click Add
- Enter a description (e.g., "10-day package")
- Set number of days included
- Define the validity period in years, months, and days
- Set the list price
- Click Submit
Vacations
Add holiday periods with surcharges.
- Go to Configuration → Vacations
- Click Add
- Enter a name (e.g., "Christmas holiday")
- Set start date and end date
- Enter the surcharge per day
- Click Submit
Holiday data: Petboarding includes pre-loaded school vacation dates for multiple countries. Configure your country in the environment settings.
Documents
Edit legal documents displayed to customers.
- Go to Configuration → Documents
- Edit the Terms and Conditions content
- Edit the Privacy Policy content
- Changes take effect immediately
Email Templates
Customize the emails sent to customers.
- Go to Configuration → Email Templates (if enabled)
- Select a template:
- Booking approved
- Booking rejected
- Booking standby
- Booking reply
- Edit the subject and body using Handlebars variables:
{{customer.firstName}}— Customer's first name{{startDate}}/{{endDate}}— Booking dates{{pets}}— Pet names{{invoiceUrl}}— Payment link
Integrations
Check the status of connected services.
- Go to Configuration → Integrations
- View the SlimFact integration status:
- ✅ Connected and authorized
- ⚠️ Authorization expiring — Re-authenticate
- ❌ Not connected — Check configuration
- Click Re-authenticate to refresh the SlimFact connection
Deleting Pets (Permanent)
Administrators can permanently delete pet records:
- Go to the pet's profile (via employee or admin routes)
- Click Delete pet
- Confirm the deletion
Warning: This action is irreversible. Consider marking the pet as "deceased" instead.
Tips
- Review bookings daily — don't let pending bookings pile up
- Check the occupancy calendar — plan capacity before approving large bookings
- Configure pricing carefully — test with a sample booking after changing categories or prices
- Use announcements proactively — post holiday schedules and maintenance closures early
- Monitor financials regularly — keep an eye on unpaid bookings to maintain cash flow